How to Attach Bucephalandra to Lava Rock Without Super Glue Showing
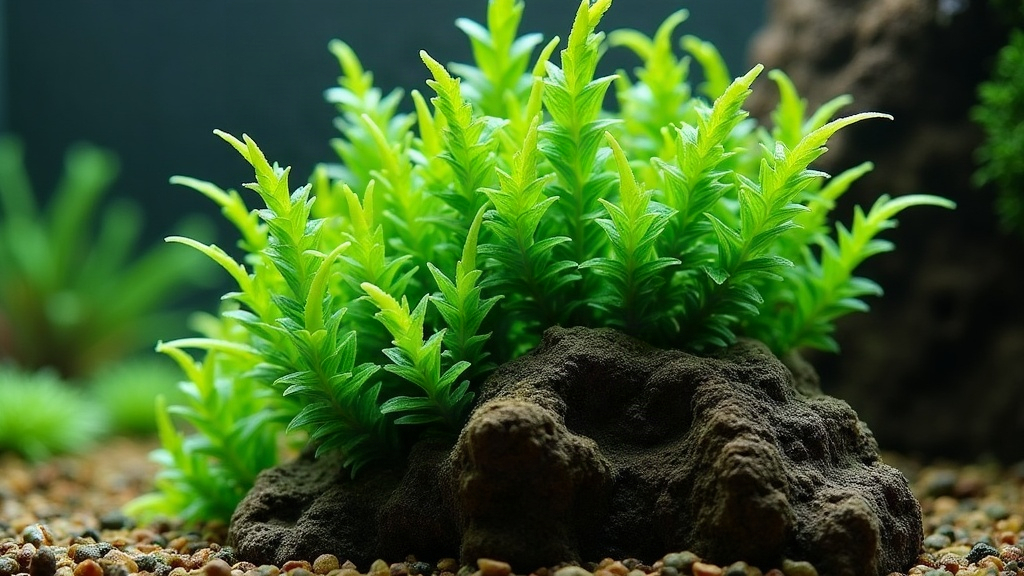
Attaching Bucephalandra to lava rock without a visible smear of super glue is completely doable. It really just comes down to three things: where you place the bond, how much glue you use, and which way the rhizome faces. The trick is tucking the glue into crevices, under leaf cover, or beneath the rhizome itself, never on a spot that faces the viewer straight on. Below is a full walkthrough covering tools, technique, and the fixes for when things go wrong, so your Buce ends up looking like it grew there rather than got stuck on as an afterthought.
Why Glue Lines Show Up in the First Place
Most visible glue mistakes trace back to three habits:
- Too much glue. Excess cyanoacrylate cures white and hardens into an obvious blob.
- Flat rock surfaces. Gluing onto a smooth, exposed face gives you nothing to hide behind.
- Wrong rhizome angle. Lay the rhizome face-up instead of tucking it sideways or downward, and the glue sits in plain sight.
Lava rock, honestly, is one of the best hardscape materials for this exact job. Its pits, holes, and rough texture are practically built for hiding a bond, you just have to actually use that texture instead of ignoring it.
What You’ll Need
- Gel-type cyanoacrylate (super glue). Gel formulas cure fast and don’t run everywhere.
- Cotton swabs or a toothpick for precise dabs
- Aquarium-safe epoxy putty (optional, for bigger gaps)
- Fine tweezers, curved tip if you have them
- A spray bottle with water to keep the rhizome from drying out mid-job
Step-by-Step: Hiding the Glue
1. Choose a Textured Pocket, Not a Flat Face
Turn the lava rock over in your hands and look for small holes, cracks, or little overhangs. These natural pockets make ideal anchor points. The glue sinks into the texture, and the surrounding rock does the work of hiding the cure line for you.
2. Dry the Attachment Point
Lava rock soaks up water like a sponge. Pull the rock out of the tank (or just work outside the aquarium altogether) and let that exact spot air-dry for 60 to 90 seconds. Cyanoacrylate grips much better, and cures clearer, on dry stone than on wet.
3. Apply a Minimal Glue Dot
Dip a toothpick and place a dot no bigger than a pinhead, right on the rock, not on the plant. Less really is more here: a thin film bonds just as well as a big blob, and it won’t squeeze out from under the rhizome when you press down.
4. Press the Rhizome Sideways, Not Flat
Don’t lay the rhizome flat on top of the wet glue, that just pushes the excess out to the sides where everyone can see it. Instead, angle the rhizome so one edge sinks into the pocket while the leaves fan outward and up. That way, the rhizome’s own body buries the contact point.
5. Hold and Cure
Hold it steady for 20 to 30 seconds. Gel formulas set quickly, but give it about a minute for a full cure. Working outside the tank for more than a couple of minutes? Mist the plant lightly so it doesn’t dry out.
6. Let Growth Do the Rest
Give it three to six weeks. New roots will grip the rock on their own, and fresh leaf growth will drape right over the original glue point, hiding it for good.
Alternative: Epoxy Putty for Gaps
No tight crevices on your piece of lava rock? Aquarium-safe epoxy putty works as a solid backup. Roll a small ball, press it into a low spot, mold it around the underside of the rhizome, then smooth the edges so they blend with the rock’s texture. Once it’s underwater, algae and biofilm will start colonizing the putty within a couple of weeks, and it basically vanishes from view.
Common Mistakes to Avoid
- Gluing wet rock. The bond comes out weak and often leaves a white haze behind.
- Overapplying glue. When in doubt, use less than you think you need.
- Ignoring rock texture. Always hunt for a pocket before you commit to a spot.
- Ignoring plant orientation. Bucephalandra actually grows best rhizome-down or sideways anyway, which just happens to be the angle that hides glue best too.
Final Thoughts
Hiding super glue on a lava rock mount really boils down to three habits: dry surfaces, minimal glue, and placing the bond where the rock’s texture can cover for you. Add a bit of patience on top of that. A few weeks of fresh roots and new leaves will camouflage even a slightly clumsy first attempt. Get the technique down once, and every hardscape mount after that will look effortless.