How to Build a Low-Flow Blackwater Shrimp Tank
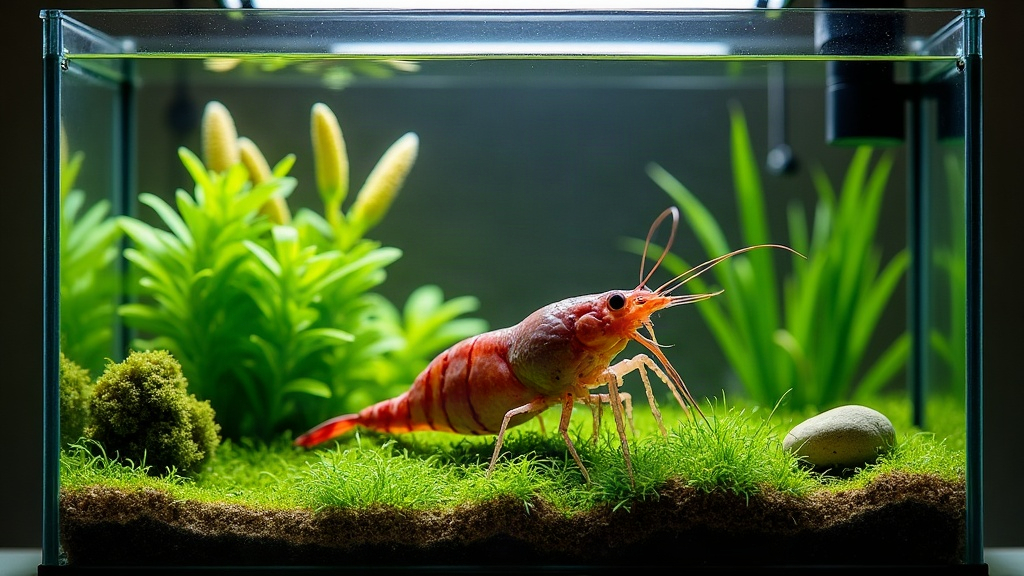
A low-flow blackwater shrimp tank tries to copy something you’d find in nature: those quiet, tea-colored forest pools where freshwater shrimp have thrived for generations. Get the filtration gentle enough, toss in some alder cones and dried leaf litter, hold your water parameters steady, and you end up with a setup that offers plenty of grazing surface, hiding spots for baby shrimp, and a calm environment where a colony can actually grow over time instead of just surviving.
What Is a Blackwater Shrimp Tank?
Blackwater tanks get their color from dissolved tannins and humic substances, compounds released by wood, leaves, seed pods, and alder cones as they slowly break down. The water shifts from a light amber tint to a deep tea brown, depending on how much botanical material you’re using.
That color doesn’t mean dirty water. Quite the opposite, actually. Run a blackwater tank properly and it stays clear, healthy, and honestly kind of striking to look at.
For anyone keeping shrimp, the appeal isn’t just aesthetic:
- Leaf litter and botanicals grow biofilm, which is one of the biggest food sources shrimp rely on.
- Tannins seem to offer some mild antimicrobial and antifungal benefit (nothing dramatic, but it helps).
- The natural cover gives shrimp, especially newly hatched babies, somewhere to feel hidden and safe.
- Low water movement means shrimp aren’t fighting a current all day just to stay in place.
- The whole setup mimics slow forest streams, flooded margins, shallow pools, the exact habitats these animals evolved in.
This works especially well for Caridina species that want soft, acidic water, things like crystal red shrimp, bee shrimp, and various wild-type Caridina. Neocaridina can live in blackwater tanks too, but they generally prefer water on the harder, more mineral-rich side, so it’s a bit of a compromise for them.
Choose the Right Tank and Equipment
You can technically run a small tank, but stability comes a lot easier once you’re at 10 gallons (38 liters) or more. Bump that up to 15 or 20 gallons and you get more room to work with: more leaf litter, more plants, and space for the colony to actually expand.
Essential equipment
Nothing here needs to be fancy or expensive.
- Sponge filter: Honestly the best all-around choice for this kind of tank. Gentle biological filtration, and it won’t suck up tiny shrimplets the way other filters can.
- Air pump with adjustable flow: A control valve lets you dial back the bubbling and current to whatever level feels right.
- Heater, if needed: Most tropical shrimp are happy around 68-74°F (20-23°C). Try not to let the tank sit above 77°F (25°C) for long stretches.
- Low-intensity light: Floating plants and leaf litter both look better, and the tank feels more natural, under dimmer lighting.
- Lid: Cuts down on evaporation and keeps the temperature from swinging around.
Skip the powerful hang-on-back filters unless you’re willing to baffle the output and cover the intake with a fine sponge. Otherwise that strong flow will scatter your leaf litter everywhere, stress the shrimp out, and make feeding a lot messier than it needs to be.
Start With a Shrimp-Safe Substrate
Your substrate should be chosen around the species you’re keeping, not the other way around.
Caridina shrimp do best over an active buffering soil made for soft, acidic water. Depending on your source water and mineral mix, these soils can hold pH somewhere around 5.5 to 6.5.
Neocaridina, on the other hand, tend to do better over inert dark sand or fine gravel, since they generally prefer more neutral pH and a bit more mineral content in the water.
A natural-looking layout might include:
- Fine dark sand across the open areas
- A thin layer of nutrient-rich soil tucked under the plants
- Moss-covered stones or shrimp-safe driftwood scattered around
- One concentrated leaf-litter zone, maybe along the back wall or one side
Don’t bury a big pile of fresh leaves under the substrate. As they rot down there, out of sight, they can throw your whole water chemistry off balance.
Add Alder Cones and Leaf Litter Gradually
Alder cones might be the easiest route into blackwater conditions. They release tannins at a slow, steady pace, look completely natural sitting on the substrate, and give biofilm plenty of surface area to grow on.
Go slow at the start. For a 10-gallon tank, something like:
- 5 to 10 small alder cones
- 5 to 8 medium dried leaves
- One small piece of aquarium-safe driftwood, if you want it
From there, add more over the following weeks until the water color and habitat density feel right to you.
Best leaves for shrimp tanks
Stick to pesticide-free, fully dried leaves from species known to be safe. Solid options:
- Indian almond leaves
- Oak leaves
- Beech leaves
- Magnolia leaves
- Guava leaves
Foraging leaves outside is fine as long as you know the trees haven’t been sprayed with pesticides, herbicides, or hit by roadside runoff. Rinse whatever you collect thoroughly. A quick boil will make leaves sink faster if that’s an issue for you, but it also strips out some of the tannins, so it’s a trade-off.
Don’t chase a spotless, glass-bottom look here. Let some leaves overlap and slowly break down over the weeks. That’s actually the point: shrimp will spend hours picking at the softened leaf surfaces and the microorganisms living on them.
Keep Flow Low but Oxygen Adequate
Low flow isn’t the same thing as no flow. Shrimp still need oxygen in the water, and your beneficial bacteria still need some circulation to do their job.
Adjust your sponge filter so the surface shows a gentle ripple, not a violent splash. You want to see mild movement drifting across the tank, but leaves shouldn’t be tumbling around nonstop.
If the tank is densely planted, heavily stocked, or running on the warm side, bump the aeration up a notch. Watch for shrimp gathering near the surface, lower activity than usual, or fish gasping (if you’ve got fish in there too) as red flags for low oxygen.
For a shrimp-only tank, err on the side of too little current rather than too much. Shrimp aren’t swimmers by nature. Most of their day goes into picking at biofilm, moss, wood, and leaf litter, not fighting a current in open water.
Cycle the Tank Before Adding Shrimp
Never drop shrimp into a freshly set up tank. They’re far more sensitive to ammonia and nitrite than most fish, sensitive enough that levels a fish would shrug off can wipe out a shrimp colony.
Cycle it fully first:
- Run the filter and heater for several weeks.
- Add an ammonia source, or use a controlled fishless cycling method.
- Test until ammonia hits zero.
- Confirm nitrite is at zero too.
- Keep an eye on nitrate, ideally staying under 20 ppm.
- Toss in a few botanicals early so biofilm has time to start forming.
A tank that’s had time to mature is worth more to your shrimp than one that just looks pretty and new. Let the moss, wood, cones, and leaves sit and age in there, that head start gives your shrimp something to graze on from the very first day.
Maintain Stable Water Parameters
The exact numbers shift depending on species, but consistency matters more than hitting one perfect figure.
For most Caridina shrimp, aim for:
- Temperature: 68-74°F (20-23°C)
- pH: 5.5-6.5
- GH: 4-6
- KH: 0-1
- TDS: roughly 100-150 ppm
For Neocaridina, a typical range looks like:
- Temperature: 65-74°F (18-23°C)
- pH: 6.5-7.5
- GH: 6-8
- KH: 2-5
- TDS: roughly 150-250 ppm
Test regularly, especially in those first couple months while things are still settling. Tannins will nudge pH down a little, but don’t rely on them as a substitute for properly remineralized water suited to your shrimp.
Feed Lightly and Let the Tank Feed the Shrimp
Leaf litter gives shrimp a natural food source, sure, but it’s not going to cover everything on its own.
A small feeding two or three times a week is plenty. In a tank that’s had time to establish itself, you can rotate through:
- High-quality shrimp pellets
- Blanched zucchini or spinach
- Dried nettle leaves
- Mineral foods to support molting
- A pinch of powdered baby shrimp food
Pull out anything uneaten after a few hours. Overfeeding is probably the single fastest way to wreck water quality in a low-flow tank like this one.
Conclusion
A low-flow blackwater shrimp tank comes down to patience, steady water, and natural materials, not a pile of expensive equipment. Run a gentle sponge filter, add your alder cones and leaf litter a little at a time, cycle the tank properly before stocking, and give biofilm the time it needs to develop. What you get in return is a calm, genuinely beautiful shrimp habitat, one where natural behavior shows up on its own and even the tiniest shrimplets get a fair shot at surviving.